How to Write & Send an Invoice in the Invoice Temple App

Are you feeling tired of creating invoices on your own?
Do you know about the advent of new invoice-automated software in the market?
Is it sounds new to you?
We are here to help you with our free invoicing software called Invoice Temple- create invoices in minutes and show the status of invoices. It is available both in desktop and mobile versions. Let us see about our software in detail.
Features of Invoice Temple
- Easy-to-use and professional templates are available in Invoice Temple
- Helps to create invoices in minutes without any delay
- You can manage all your income and expenses in one place
- Easy to convert estimates into invoices without any changes
- Add your listings in a clear and transparent way
- Helps to track your invoice and show the status of it.
- Invoice Temple maintains separate reports for buyers and sellers
Guide for Invoice Creation through Mobile App:
Here is a step-by-step guide on how to create invoices and send it to your client through the Invoice Temple
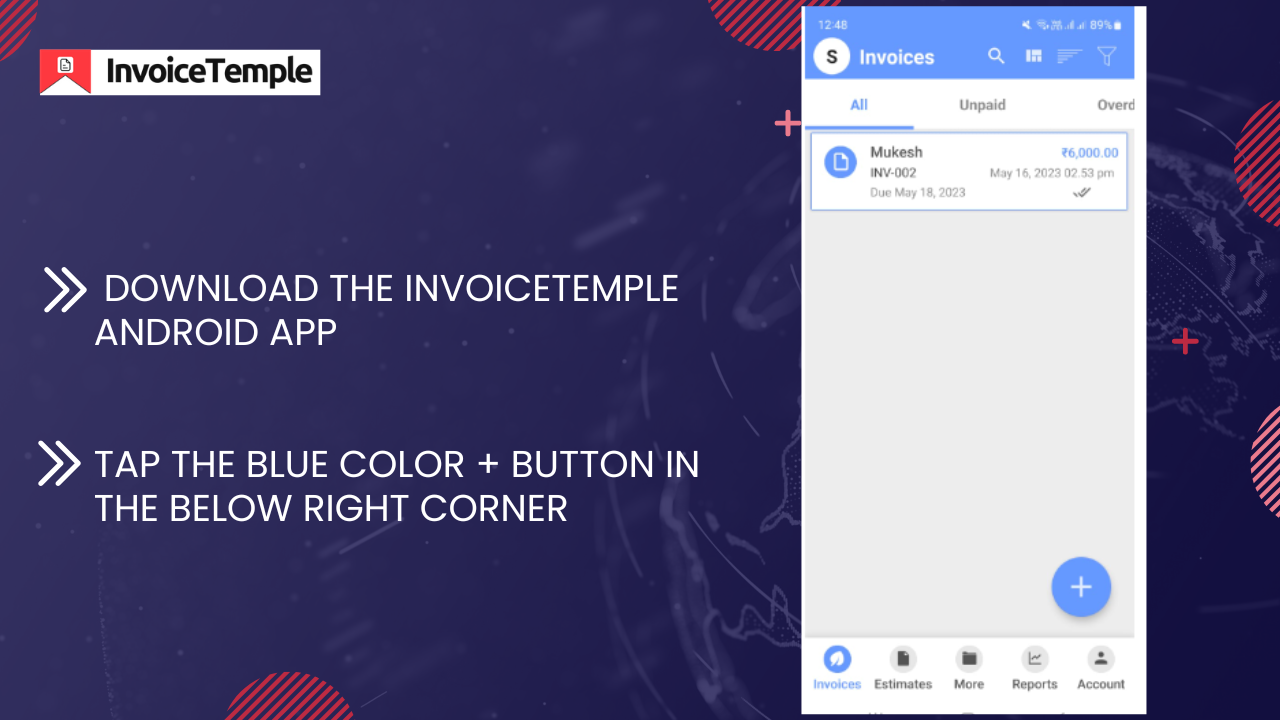
Step 1: Download the Invoice Temple Android app from the Play Store. Then open the app and finish your signup procedures.
Step 2: A new screen will appear in the name of Invoices at the top. Invoice option present in the bottom line is selected by default. Now, tap the blue color + button in the below right corner
Step 3: An invoice editor screen will open with a default invoice number. Next to the invoice number, you can see a Bill to section. Click on that button and add the client name, address, contact details, email, and shipping details. Then click on the save button.
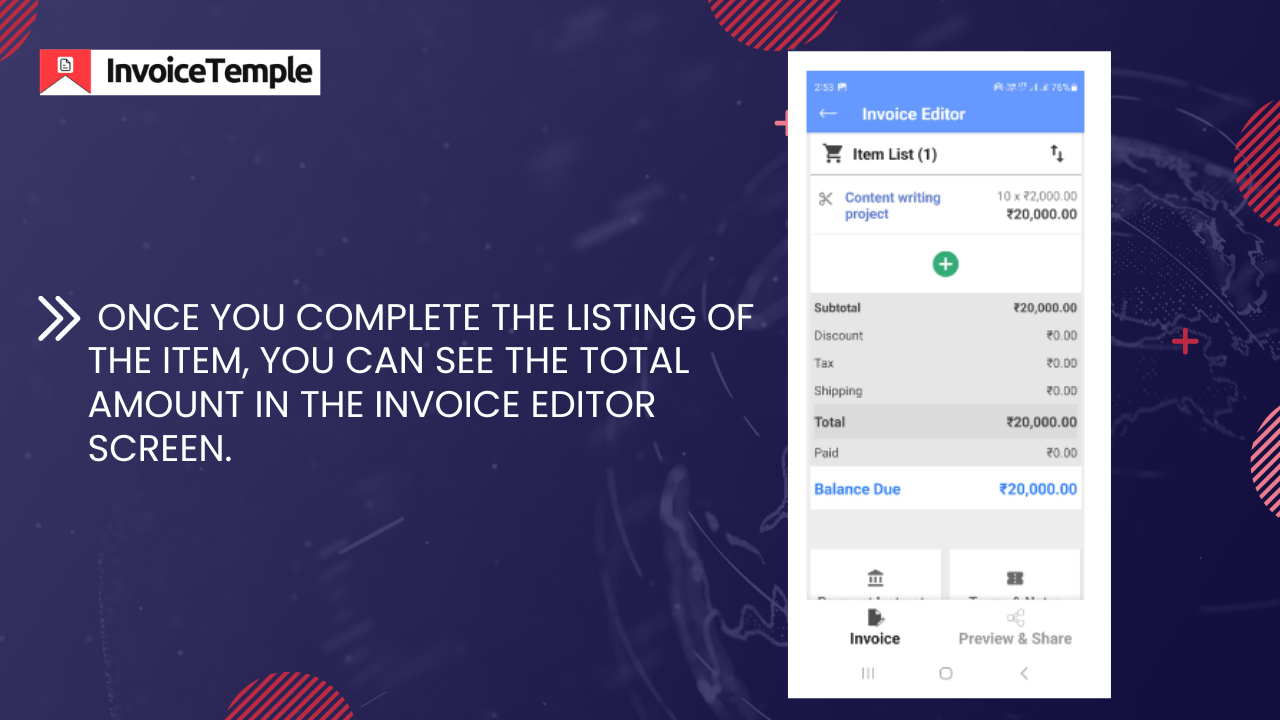
Step 4: After entering client details, click on the green color + button and add their items listing with rate and quantity. Click on the save button

Step 5: Once you complete the listing of the item, you can see the total amount in the invoice editor screen.
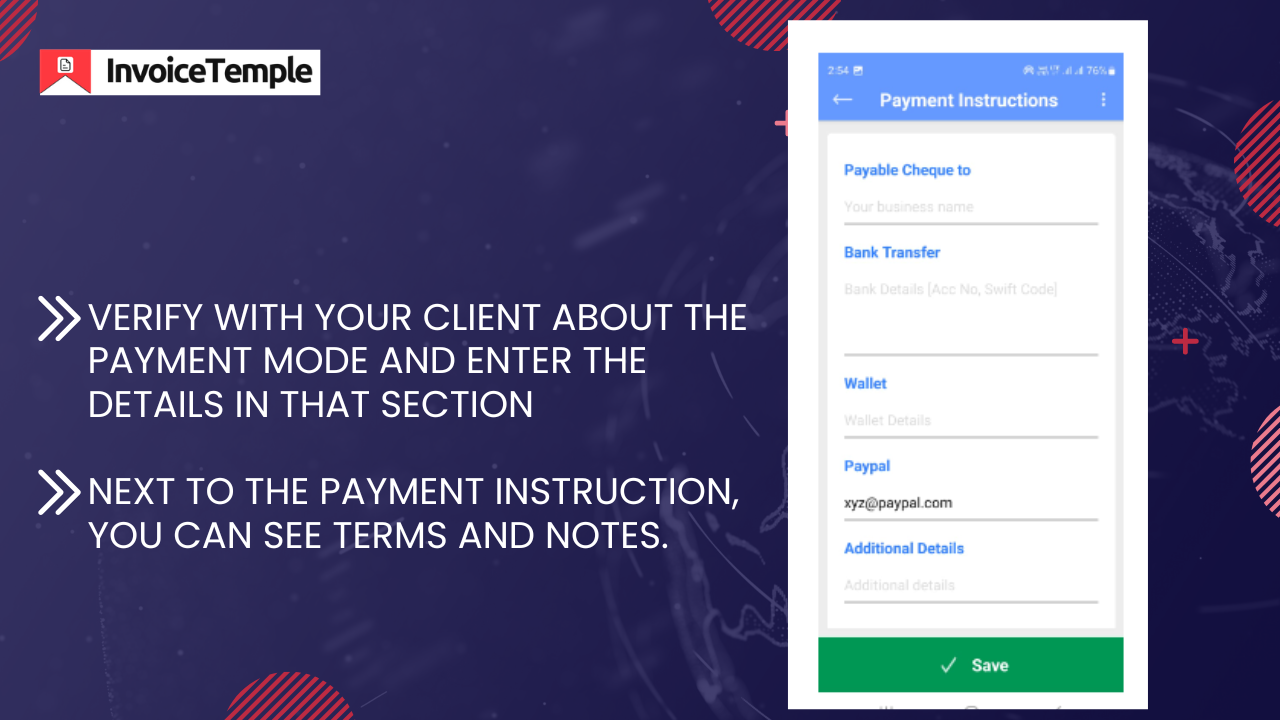
Step 6: Now click on payment instructions in the bottom left corner. Here you can see a list of payment options such as cheque, bank transfer, wallet, and PayPal. Verify with your client about the payment mode and enter the details in that section. Then click on the save button.
Step 7: Next to the payment instruction, you can see terms and notes. If you want,
add your company terms and conditions to avoid conflict with your client.
Step 8: Add your company signature to avoid fraudulent activities
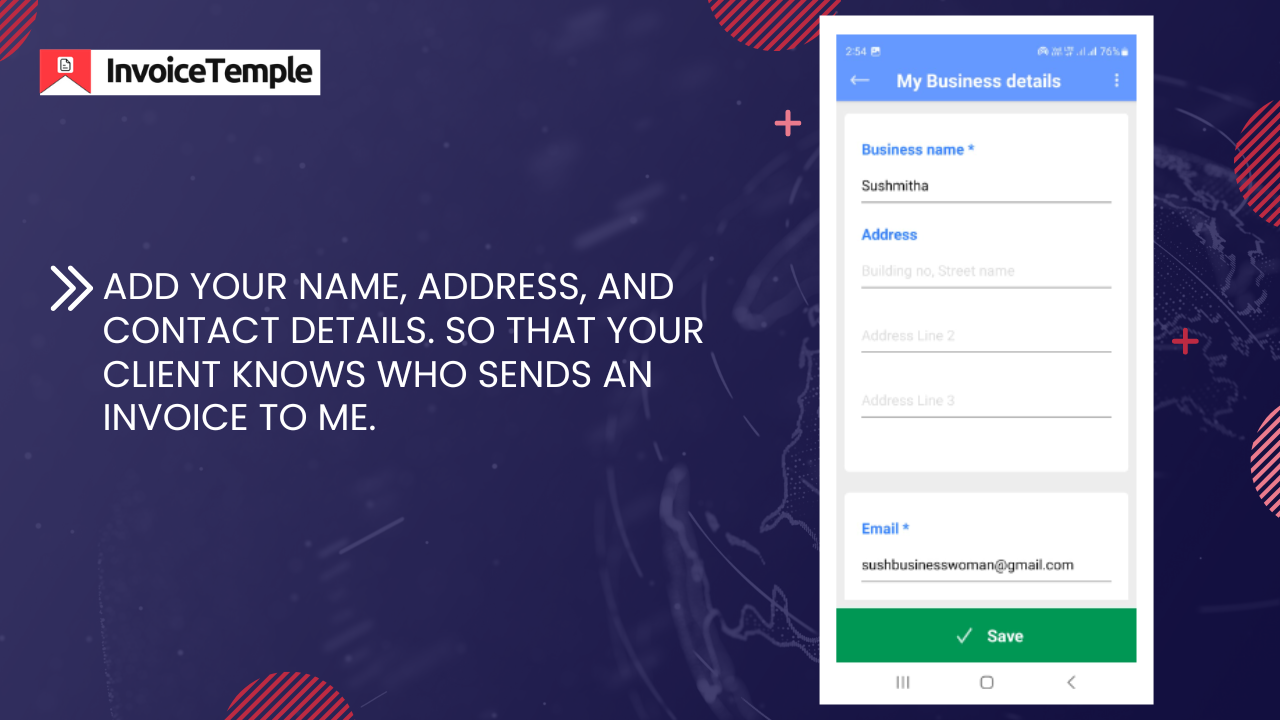
Step 9: Next to the signature, you can see From column. Add your name, address, and contact details. So that your client knows who sends an invoice to me. Then click on the save button.
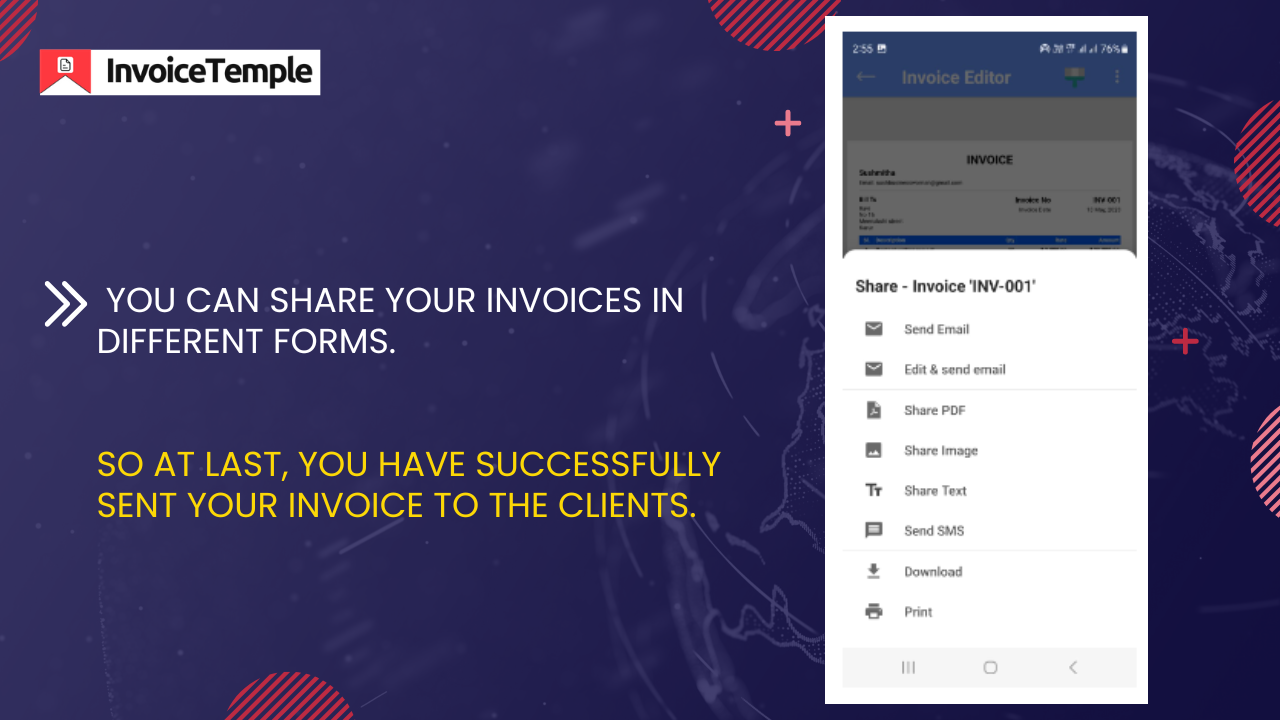
Step 10: Now click on the preview and share option in the bottom right corner. You can see a preview of your invoice. Check all the details and click on options.

Step 11: Then click on options and you can share your invoices in different forms. So at last, you have successfully sent your invoice to the clients.
Final Thoughts
It is so simple to create invoices in minutes and you can share them in a secure way. Then why are you waiting for? Download our Mobile Accounting App now. Create the first five invoices for free and upgrade to the latest version.